Why Input Quality Determines Output Quality
A 3D rendering is only as accurate as the information it is built from. If a studio does not know the exact dimensions of your sofa, the 3D model they build will be an approximation. If they do not have a clear fabric reference, the texture in the final image will be generic. If the brief says "modern living room" with no reference images, the scene could go in a dozen directions — none of which may match your brand.
The studios that produce the most accurate, revision-free renders are not necessarily more talented — they just receive better input. Before you send a single email, spend thirty minutes assembling the right files and references. That half hour will save you two or three revision cycles worth of back-and-forth.
The Ideal Scenario: CAD and Technical Drawing Files
If your product was designed digitally — which is true of most manufactured furniture — you likely have technical files in one of the following formats. These are the gold standard for starting a rendering project:
- DWG / DXF — AutoCAD drawing files; standard in furniture manufacturing and millwork
- STEP / STP — universal CAD exchange format; works across most modeling software
- OBJ / FBX — 3D mesh formats exported from design tools like Rhino, SolidWorks, or Maya
- SKP — SketchUp files, common among furniture designers and interior architects
- 3DM — Rhino files, especially common for organic and upholstered shapes
When you send a CAD file, the studio can import your exact geometry, verify measurements, and build or refine the model with full precision. This dramatically reduces the back-and-forth over proportions and details. If you have these files, attach them — do not just send a screenshot of the drawing.
If You Do Not Have CAD Files: Photos, Measurements, and References
Most small and mid-size furniture brands do not have CAD files for every SKU. That is completely fine. A good studio can build an accurate 3D model from photos and a dimension sheet — it just requires more modeling time and more attention to detail from both sides.
If you are working without CAD files, prepare the following:
- Multiple product photos — front, side, back, three-quarter, and any important detail shots. The more angles, the better. At least 5–8 photos per product is ideal.
- High-resolution images — at least 1,000 pixels on the short side. Blurry or dark phone photos make it impossible to accurately read details like edge profiles, joinery, leg taper, or stitch patterns.
- A full dimension sheet — overall width, depth, height, seat height, arm height, and any feature-specific measurements (cushion thickness, leg diameter, shelf spacing). Do not rely on the modeler to guess.
- Inspiration or competitor references — if your product resembles something already on the market, a reference helps the studio understand the design intent quickly.
Material and Finish References: The Most Overlooked Step
This is the area where most projects lose time. A modeler can build a perfect silhouette of your chair, but if they do not know what the fabric looks like, the render will not match your product.
For each material or finish on the product, provide:
- Fabric swatches or close-up swatch photos — show weave direction, pile height, sheen level, and color accuracy. A clean photo of the physical swatch on a white background works well.
- Wood samples or veneer reference — grain direction matters. Light oak with a straight grain reads very differently from walnut with a wild figure. Reference photos from the supplier work fine.
- Paint and lacquer codes — RAL codes, Benjamin Moore codes, Pantone references, or hex values. "Dark gray" is not a material specification.
- Metal finish references — brushed gold, matte black, polished nickel? Show a reference, not just a description.
- Leather references — pebble grain, full-grain smooth, semi-aniline? Include supplier name if you can, or a clear macro photo.
The most common delay in furniture rendering projects is missing material information. Sending a fabric swatch photo or Pantone code upfront saves one full revision cycle — typically 24–48 hours of turnaround time per round.
Dimension Sheets: Why Exact Measurements Matter for Furniture
Furniture operates at human scale, and buyers notice when proportions feel off. A sofa that is 10% too wide in the render will look wrong in a living room scene — even if the viewer cannot articulate why. A dining table that sits too tall relative to the chairs will break the believability of the entire composition.
For every piece, include a dimension sheet with all key measurements labeled. If your factory or supplier provides a technical datasheet, include it. Even a quick sketch with handwritten measurements is more useful than no dimensions at all. For seating, the following are non-negotiable: overall width, overall depth, seat height, seat depth, arm height, and back height.
When you work with our 3D modeling team, we review your dimension sheet before starting the model and flag any inconsistencies or missing values so they can be resolved before the first preview — not after.
What a Good Creative Brief Should Include
Beyond the product files themselves, a creative brief tells the studio what kind of image to create. Without this context, even a perfect 3D model can result in renders that do not match your intended use.
A useful creative brief covers:
- Intended use — eCommerce listing, print catalog, social media, trade show display, or all of the above?
- Platform format — Amazon requires a white background for the hero image. Shopify product pages often use square crops. Instagram performs well with warm lifestyle scenes. Match the deliverable to the platform.
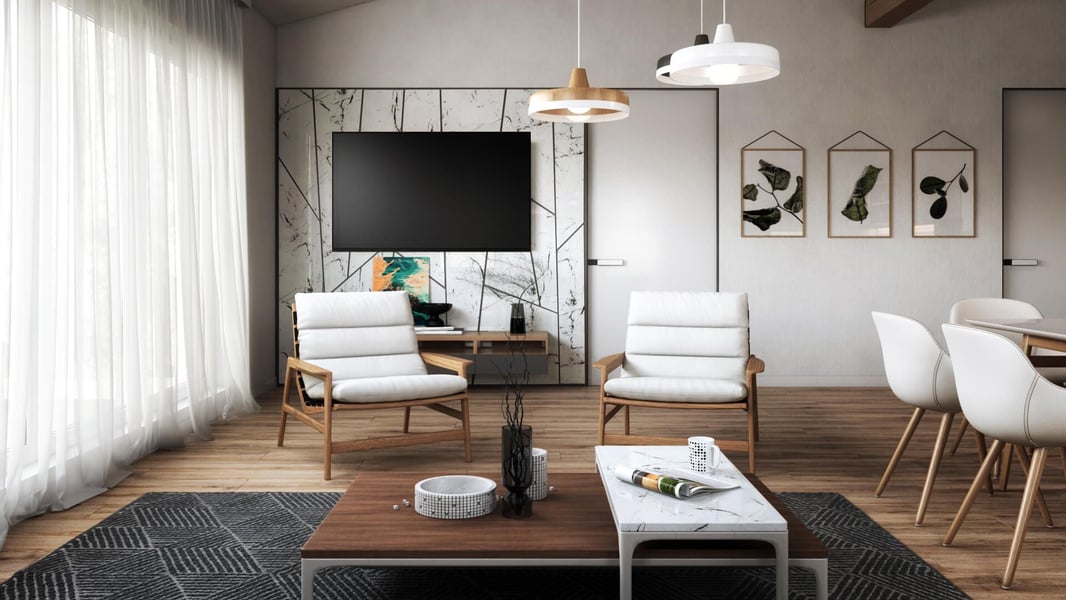
- Lifestyle or silo? — silo renders (white background, product only) serve product pages; lifestyle renders (staged scene) sell the mood and context. Most brands need both.
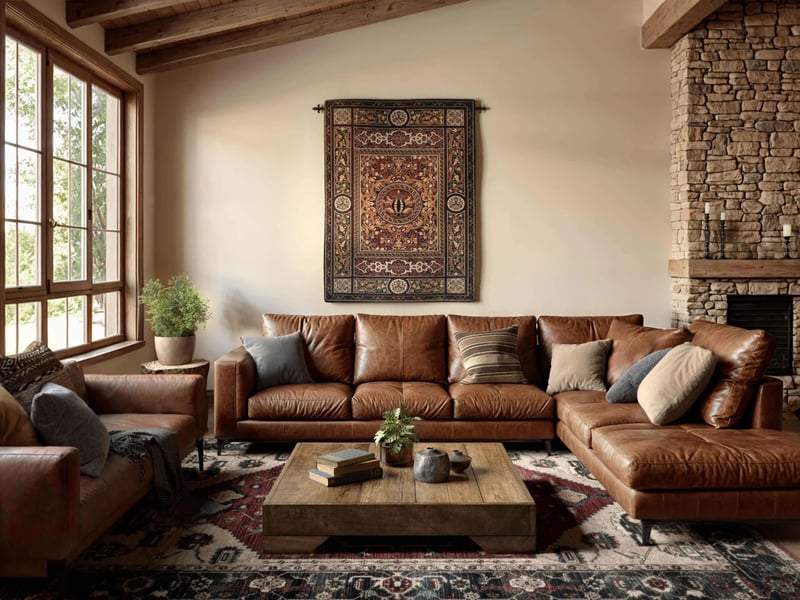
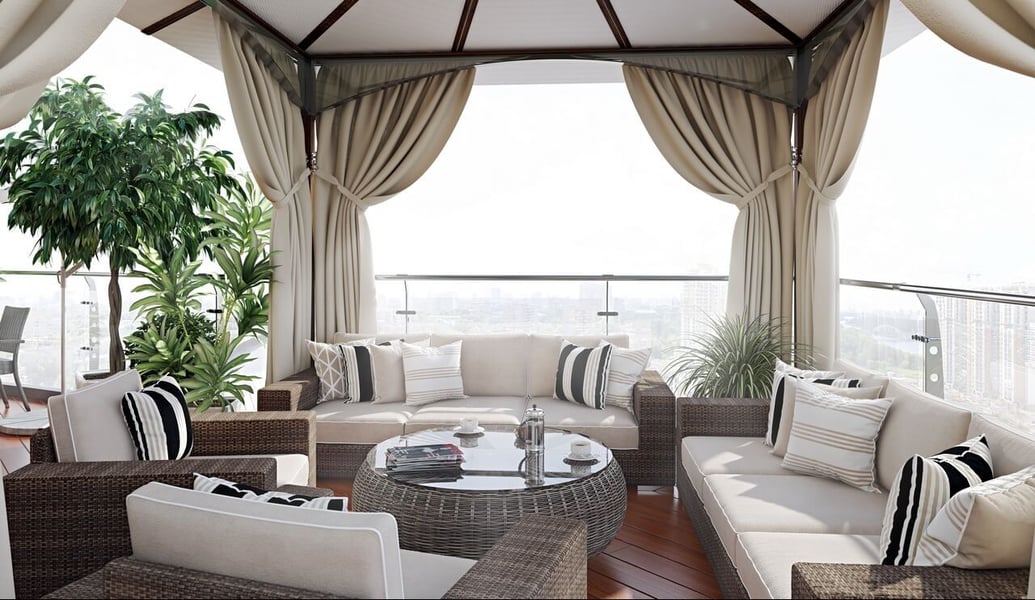
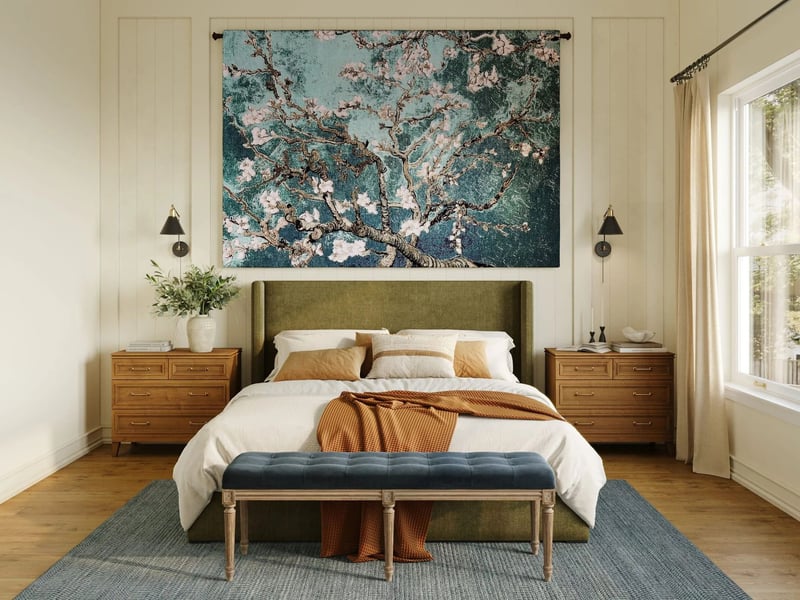
- Scene direction — if lifestyle, what setting? Living room, bedroom, outdoor terrace? What time of day? What color palette?
- Camera angles — how many shots? Three-quarter front is standard, but you may also want a straight-on front view, a detail shot of the joinery or fabric, and a full-room perspective.
- Mood and style references — links to inspiration images (Pinterest boards, competitor sites, brand look books) are enormously useful. A well-curated reference board takes five minutes to assemble and saves thirty minutes of back-and-forth.
For a detailed walkthrough of how to put together a brief, read our guide on how to brief a 3D rendering studio.
What Happens After You Send Your Files
Once a studio receives your product files, materials, dimensions, and brief, the typical workflow looks like this:
- 3D modeling — the studio builds or refines the product model from your CAD files or photos. For complex upholstered pieces this can take a day or more.
- Modeling preview — a wireframe or basic shaded preview is sent for approval before texturing begins. This is the best moment to catch proportion or geometry issues.
- Texturing and materials — fabrics, finishes, and materials are applied based on your references.
- Scene setup and lighting — if lifestyle, the environment is built and lit. If silo, the product is placed on a clean white background with neutral studio lighting.
- First draft renders — full-resolution images are delivered for review.
- Revisions — camera angle tweaks, color adjustments, prop changes, or material refinements based on your feedback.
- Final delivery — high-resolution files in agreed formats (JPG, PNG, TIFF) at the required resolution.
The same foundational files that go into still renders also power lifestyle 3D rendering projects and, further down the line, animation and AR deliverables. Brands planning to build out a full multi-format asset library should read our guide on scaling a furniture brand with 3D rendering to understand how these assets compound over time. To see how this workflow compares to traditional photography, read our breakdown of 3D rendering vs. product photography for furniture.
Common Mistakes That Slow Projects Down
After working with furniture brands across every category and price point, the same avoidable mistakes come up repeatedly:
- Sending only low-resolution or heavily compressed photos — the studio cannot read fine details from a blurry JPEG at 400px wide.
- No dimension sheet — "you can get the dimensions from the product page" is not a dimension sheet. Provide a labeled drawing or at minimum a list of all key measurements.
- No material references — describing fabric as "a warm beige linen" leaves too much room for interpretation. A swatch photo eliminates ambiguity.
- No brief — sending product files without any context about how the images will be used forces the studio to make assumptions about everything from camera angle to scene style.
- Approving the modeling stage without checking carefully — geometric issues are much cheaper to fix before texturing and rendering than after. Take five minutes to verify proportions at the wireframe stage.
Ready to Get Your Furniture CGI Quote?
Send us your product specs and we'll prepare a personalized rendering quote within 24 hours.
Request a Free Quote →